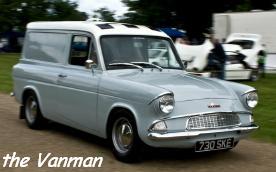
The Anglia was in production for about eight years and in that time changed very little from the original design bar a few cosmetic changes. Mechanically it changed very little too, or the changes that did occur would cause few problems when interchanging parts. At or least that’s what I thought until I decided to upgrade the brakes on my 1961 Van. I had bought a smallish caravan to tow behind the Van to some of the weekend shows. In order to make things a little safer during towing, I decided to upgrade the front drums to discs, and change the 997 rear drums for the larger 1200 type. Although this was done on my Van you can equally carry out this modification on Saloons as well as Estates. Please note you should only upgrade the rear brakes in conjunction with upgrading the front brakes too. Otherwise you can seriously upset the balance/handling of your car under braking.
This article only covers upgrading of the rear brakes.
Before starting work you should also ensure that you have ALL the necessary parts, equipment / tools.
I started off by selecting a pair of 1200cc back plates from my stock of parts. Don’t forget you will need the drums to match as well. I had two NOS ones to hand so didn’t have to worry about those too much.Once I had stripped the back plates down for cleaning and painting, it became obvious that they had seen some serious handbrake action (indentations arrowed).
So I cleaned the damaged area with a grinder, where the handbrake pivot had almost worn through the back plate.
Then I put several well placed blobs of MIG weld in this area to build the metal back up.
I then grinded the area smooth again
After a good wire brushing, I painted the whole back plate in that POR15 special paint from Frosts of Rochdale (Note - Don’t get this stuff on your hands as it doesn’t come off for days, wear gloves) - you can use a similar type paint for this. The process was then repeated on the back plate for the opposite side.
I stripped and cleaned the wedge adjusters and lubricated them with copper grease. Both back plates were then reassembled with new brake shoes, wheel cylinders and new cylinder retaining clips. (ensure that the retaining clips are located properly).The handbrake pivot levers were also replaced with new ones.
So far so good. I should also point out here that you should always check that you are replacing rear wheel cylinders with the same size bore as each other. There are two sizes available. Also you need to remember you cannot upgrade to 1200 brakes just by changing the drum and brake shoes. The back plates are different too.Right then with your newly refurbished back plates, it should be a simple matter of swapping them with the old ones. Slacken the wheel nuts on both sides of vehicle, then jack up to the required height and put the axle stands into position. Remove the road wheels, and then remove the screw holding the drum to the half shaft.
After taking off the drum, undo the four nuts/bolts holding the halfshaft retaining plate. Release the handbrake clevis, then using a proper hose clamp (not Mole grips!) clamp the flexible brake pipe going to the rear axle. You can now undo the brake pipe into the wheel cylinder. Use a container to catch any brake fluid. Using a suitable puller withdraw the half shaft. Again use the container to catch any axle oil that may leak. You can then remove the old back plate, then, place the refurbished one into position.
It was at this point that my jaw hit the floor when I realised that the back plates I had refurbished did not fit the early type axle on my Van. After ten minutes of head scratching, I headed off indoors to the research department.
So to sum up. There are two types of early axle – that is the axle with the oil seal just inside the casing itself, followed by yet a third change in mid 1966 when the oil seal was put into the bearing itself. The bearing incidentally, was given steroids and grew in size to such an extent that it does not fit in either of the earlier casings. It is also therefore not possible to put the pre mid 1966 bearings into the later post mid 1966 casings. OK? Good!
Right, back to the problem in hand. I was aware that during production the back plate fixing was changed from studs to bolts and that, the bolthole pattern remained the same throughout. What caught me out was that the large hole in the back plate had changed size too. On the very early casings there is a location flange for the back plate; therefore the hole is much larger. I’m guessing the change possibly occurred, around late 1962 when the 1200 engine and running gear were introduced to the Anglia range. Anyway the smaller hole in my 1200 back plates was not going to fit on this flange.
The very Early Type Axle end:Note the studs and casing locating flange for the brake backplate.Later Type Axle end: Oil seal in position. Note boltholes as opposed to studs used on very early axles. No locating flange neither. Post 66 casings do not have oil seal like this. Its integral with the larger bearing.
So I ended up searching for another axle casing from my store to which these back plates would fit. Luckily I had one, which meant the problem was solved relatively easily. Before refitting the axle I changed the oil seals in the casing. I have a special tool for removing them, but you can hook/lever them out with a screwdriver. I then tapped the new ones in using a nylon drift. You can use a suitable sized socket for this, but use a soft mallet to avoid shattering the socket.
So basically there you have it. Re-assembly is basically a reversal of the dismantling instructions. I had to re-tap / clean the threads that hold the halfshaft locating plate in position, due to paint and rust.
Rebuilt back plate in position and tightening of halfshaft bolts.
New old stock drums complete the job. Don’t forget to thoroughly check all brake pipes for damage / rust and replace if necessary, then re-bleed the brake system with fresh fluid.
I also took the liberty of changing the rear springs as the originals had gone rather flat. (spot the difference!!) This made me realise why on more than one occasion the mudflaps had dragged on the road.
Driving the Van has now been transformed. With the standard leg disc brake conversion on the front as well as the larger rear brakes, it means I have much more confidence in the stopping abilities. Whilst all this may offend the purists, it’s almost impossible to tell it has had these modifications without grovelling on the floor. As my young lad now travels regularly in the van I feel safety has the edge over originality.
In the April1st edition of Anglebox Magazine, I will be showing you how to fit airbags to your Anglia. The next door neighbour recently parked his Mondeo across the entrance to my garage. The car mysteriously disappeared overnight, and I now have all the bits I need to complete the modification. So until the next edition, drive and work safely at all times.
Please also Note – a Van axle casing is approx 3 inches (75 mm) approx wider than a Saloon.
A Saloon casing will not fit into a Van either.
Advice as always from me, The “Vanman” or the other tech advisors,
phone numbers in the Who’s Who at the front of the Club Magazine.
Please note your health may be at risk if you do not take sensible safety precautions. Never work under an unsupported vehicle, do not take shortcuts. If you feel that the task is beyond your capabilities, then employ the services of a trained professional. The Ford Anglia 105E Owners Club nor the author cannot be held responsible for any accidents or injury arising from advice given on this webpage. Safety advice can be obtained from the RoSPA. The advice and opinions given are purely those of the author and not necessarily those of the Ford Anglia 105E Owners Club.
Due to holidays, no Spares will be dispatched between 22nd April and 1st May. Dismiss