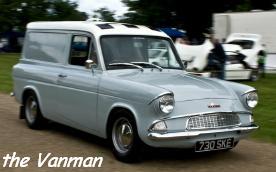
(from the “Vanman”)
The wing on this project van was unusually perfect on the front leading edge. The back edges have totally gone both sides. I decided to cut the useable section of wing off before it got damaged as this can be used on another vehicle.Ford was not helpful in this department as Anglia wings were welded on. So I used various tools to get the wings off with the least amount of damage.
Starting along the inner wing rail, I used a power file just to remove the paint, so that it was easier to see where the spotwelds were. I have an 8mm diameter spotweld drill, which is about right for the welds on an Anglia. You should be able to get one of these from your local motor factors. The beauty of this is the holes I’ve drilled in the wing can be used for plug welding when the wing section is reused if necessary. The other tool I used was an air powered body saw. Once again this only makes a very thin cut, with minimal panel distortion. I needed to save the front panel in this case, so the wing was sawn very close to the panel joint leaving the front panel intact. You could in theory also drill out the spotwelds here too, but to get in I would need a drill with a head at 90 degrees. But it is very difficult to actually see where the welds are on the front panel/wing joint. Obviously if you are not reusing the wing all this is irrelevant as you can cut sections off just so you grind back to the flanges you need.
The following pictures where taken during the removal. It is impossible to show everything, so I hope it is clear what is going on.


One other tip. Normally the bonnet hinge mounting holes are part of the outer wing assembly and often corrode away. In this case the originals were perfect. So when I removed the wing, I actually left this small panel part on the shell. This should mean I will have no trouble realigning the bonnet to the front panel; I can then align everything else up from this i.e. the wing and door.
Advice as always from me, The “Vanman” or the other tech advisors, phone numbers in the Who’s Who at the front of the Club Magazine.
Article © Copyright 2009 – the “Vanman”
Warning – The Health and Safety bit
Please note your health may be at risk if you do not take sensible safety precautions. Never work under an unsupported vehicle, do not take shortcuts. If you feel that the task is beyond your capabilities, then employ the services of a trained professional. The Ford Anglia 105E Owners Club nor the author cannot be held responsible for any accidents or injury arising from advice given on this webpage. Safety advice can be obtained from the RoSPA. The advice and opinions given are purely those of the author and not necessarily those of the Ford Anglia 105E Owners Club.